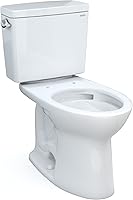
How to Repair an American Standard Champion 4 Toilet
To repair an American Standard Champion 4, match the symptom to the part: a running toilet usually means a worn tank-to-bowl gasket or fill valve, while a slack handle points to the trip lever. Shut off the water and flush before you open the tank, then swap the part that caused the fault.
On this page (7 sections)
- Why does my Champion 4 keep running after a flush?
- How do you replace the tank-to-bowl gasket on a Champion 4?
- What causes weak flushing or slow filling?
- How do you fit a new fill valve in a Champion 4 tank?
- How do you fix a loose or broken trip lever?
- What should you check before ordering a Champion 4 part?
- When is it worth repairing rather than replacing?
To repair an American Standard Champion 4, match the fault to the part: a running toilet points to the tank-to-bowl gasket or the fill valve, while a slack handle points to the trip lever. Shut off the water and flush the tank before you reach inside, then replace the part that failed.
Most Champion 4 fixes are a single swap you can do in under an hour, once you know your tank model.
The steps below walk through the how to repair American Standard Champion 4 job symptom by symptom, from a leak you can see to a flush that has gone weak. Check the model number stamped inside the tank, behind the water line, before you buy any part, because the Champion 4 uses a 4-inch flush valve rather than the 3-inch parts found in many other toilets.
Why does my Champion 4 keep running after a flush?
A Champion 4 that keeps running usually has a tank-to-bowl gasket that no longer seals, so water trickles into the bowl and the fill valve tops the tank back up. The valve is often fine; the seal under the tank is the fault.
To check, lift the tank lid and watch the water level for a few minutes. If it drops without anyone touching the handle, the water is escaping past the gasket or the flush valve seal.
Cut the supply at the wall and dry the area, then look for a worn, hard or cracked green gasket under the tank.
A flush valve that stays slightly open gives the same symptom. Look at the chain or link and make sure it hangs with a little slack, not tight against the valve.
A tag or chain jammed under the seal holds the valve open and mimics a bad gasket.
When the gasket itself is the cause, replace the whole tank-to-bowl joint rather than only the flapper. The old bolts and washers often crumble once you loosen them, and a kit gives you fresh parts for the job.
How do you replace the tank-to-bowl gasket on a Champion 4?
Shut off the water, flush, disconnect the supply line and lift the tank off the bowl. Then fit the new gasket on the flush valve and bolt the tank back down evenly, alternating sides.
The job is easier if you remove the tank first. The gasket sits between the tank and the bowl, around the large flush valve nut, and you cannot seal it properly with the tank in place.
A helper makes lifting the tank safer, because porcelain is heavy and a drop cracks it.
- Close the supply valve and flush to empty the tank.
- Sponge out any remaining water and disconnect the supply line.
- Unbolt the tank from the bowl and lift it off with both hands.
- Scrape the old gasket away and clean the mating faces.
- Set the new gasket in line with the flush valve nut.
- Fit new bolts with the rubber washers and lower the tank back on.
- Tighten the nuts by hand, then a quarter to half turn each side.
Tighten by feel, not by force. Overtightening rocks the tank and can crack the porcelain, so stop as soon as the tank feels firm and level.
The Jwodo kit is built for the Champion 4-inch flush valve and its listed tanks, including 4149A and 4215A, plus the 2002 and 2018 toilets. Count the parts in the bag before you start; the cone washer and coupling nut save a second trip if the supply connection weeps after the rebuild.
What causes weak flushing or slow filling?
A weak flush usually comes from a fill valve or supply setting that leaves the tank short of water, not from the bowl itself. Slow filling is the same valve struggling to refill.
Watch the tank after a flush. If the water never reaches the marked level, the fill valve is closing early or the supply is partly shut.
Open the supply fully first, then look at the valve. Mineral scale on the seal is a common cause in hard water.
A noisy valve that shrieks as it fills is another sign of scale or a worn washer. The fix is a new fill valve, not a repair kit on an old body, because the internal parts wear as a set.
Before you fit a new valve, flush the supply line into a bucket to clear grit. Grit is what damages the fresh seal and brings back the running noise.
How do you fit a new fill valve in a Champion 4 tank?
Empty the tank, remove the old valve, set the new valve height and clip it in place, then set the tank and bowl water levels. The whole swap takes about 20 minutes.
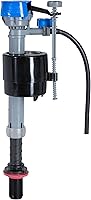
The Fluidmaster 400H adjusts from 9 to 14 in with its EZ-Twist body, so you can set the height to match your tank without cutting anything. Its tank and bowl dials let you set the refill separately, which matters on a Champion 4 because the large flush valve needs enough water behind it for a strong flush.
- Close the supply and flush.
- Sponge the tank dry and loosen the shank nut under the tank.
- Lift the old valve out and clean the tank floor.
- Set the new valve height to your tank and tighten the shank nut.
- Reconnect the supply with the coupling nut and cone washer.
- Open the water and adjust the tank and bowl dials.
- Run two test flushes and check the fill line.
Set the tank level to the mark on the tank wall. Set the bowl dial so the water in the bowl sits at its normal resting height, then check for leaks at the shank and supply nut.
Fluidmaster backs the 400H with a 7-year warranty and lists it for most toilet brands. It fits the Champion 4 tank, and the two dials let you tune the refill without changing the valve body.
How do you fix a loose or broken trip lever?
A slack handle or one that no longer lifts the flush valve needs a new trip lever. The plastic lever arm cracks or the mounting wears, and the handle stops lifting the chain.
Pop the tank lid off and press the handle. If the arm moves but the valve does not lift, the link has come off or the arm has snapped.
If the handle flops without any resistance, the pivot has failed.
The Champion 4 uses a left-hand lever. Check the side of your tank before you order, because a right-hand lever will not fit the same opening.
Once you have the correct part, the swap is a clip or screw fitting and a new chain link.
Fit the new lever, hook the link to the flush valve with a little slack, and test the handle with the tank full. The handle should feel firm and return on its own after a flush.
This lever is a direct American Standard part for Champion 4 tanks, so the fit and the left-hand orientation match the factory opening. The satin nickel finish also suits a bathroom where the handle is on show.
What should you check before ordering a Champion 4 part?
Find the model number inside the tank and match it to the part list before you order. Champion 4 parts are not the same as Champion 4 MAX parts in every case, and neither matches most 3-inch toilets.
Look on the inside tank wall, behind the water line, for a stamped number. Notes such as 4149A, 4215A, 4260 and 4266 point to Champion 4 tanks, while 4225A covers the Champion PRO.
Match the number to the part, and call American Standard customer service with it if you are unsure.
The biggest ordering mistake is buying a universal 3-inch kit. The Champion 4 uses a 4-inch flush valve, and the green gasket in a Champion 4 kit has a hex imprint made to sit under the large flush valve nut.
A Cadet 3 kit such as 7301021-0070A will not seal the Champion 4 joint.
If you are weighing a fix against a full swap, our look at the American Standard Cadet PRO covers the other models in the range. For a side-by-side, see TOTO vs American Standard toilets to compare the two brands on flush design.
When is it worth repairing rather than replacing?
Repair the Champion 4 when the tank and bowl are sound and one part has failed. A running toilet or a slack handle is a cheap fix, and the Champion 4 body lasts far longer than its rubber parts.
Replace the toilet instead if the bowl or tank is cracked, the base rocks on the floor, or the flush valve seat itself is damaged. Cracks cannot be sealed with a gasket, and a loose base often points to a failed wax ring that needs the toilet lifted anyway.
If you reach that point, our guide to how to remove a toilet walks through lifting the old one without spreading water and wax across the floor. A new seat height may also matter: a chair height toilet vs standard explains the difference before you pick a replacement.
For most owners, the repair is the better call. Start with the symptom, confirm the model number, and buy the one part the fault points to.
That keeps the how to repair American Standard Champion 4 job simple, and it usually costs less than a new fixture.
Frequently asked questions
What causes a Champion 4 toilet to keep running?
A running Champion 4 usually has a tank-to-bowl gasket that no longer seals, so water drains into the bowl and the fill valve keeps topping up the tank. Shut off the supply and watch the water level.
If it falls without a flush, replace the tank coupling kit or the fill valve.
Do Champion 4 and Cadet 3 use the same tank parts?
No. The Champion 4 uses a 4-inch flush valve, and its tank-to-bowl kit is not the same as the one for a Cadet 3.
Buy parts listed for Champion 4 models, such as 738756-0070A, and check your tank's model number before you order.
Can I replace the trip lever on my own?
Yes. Shut off the water, flush the tank, then unclip or unscrew the old lever from inside the tank.
Fit the new left-hand lever, connect the chain or link to the flush valve, and test the handle before you refill the tank.
How do I know which Champion 4 model I own?
Look for the model number stamped inside the tank, behind the water line. Match that number to the parts you need, or call American Standard customer service with it.
A part for the wrong tank or flush valve size will not seal.